Coverage vs formation
Cover 3 vs Trips
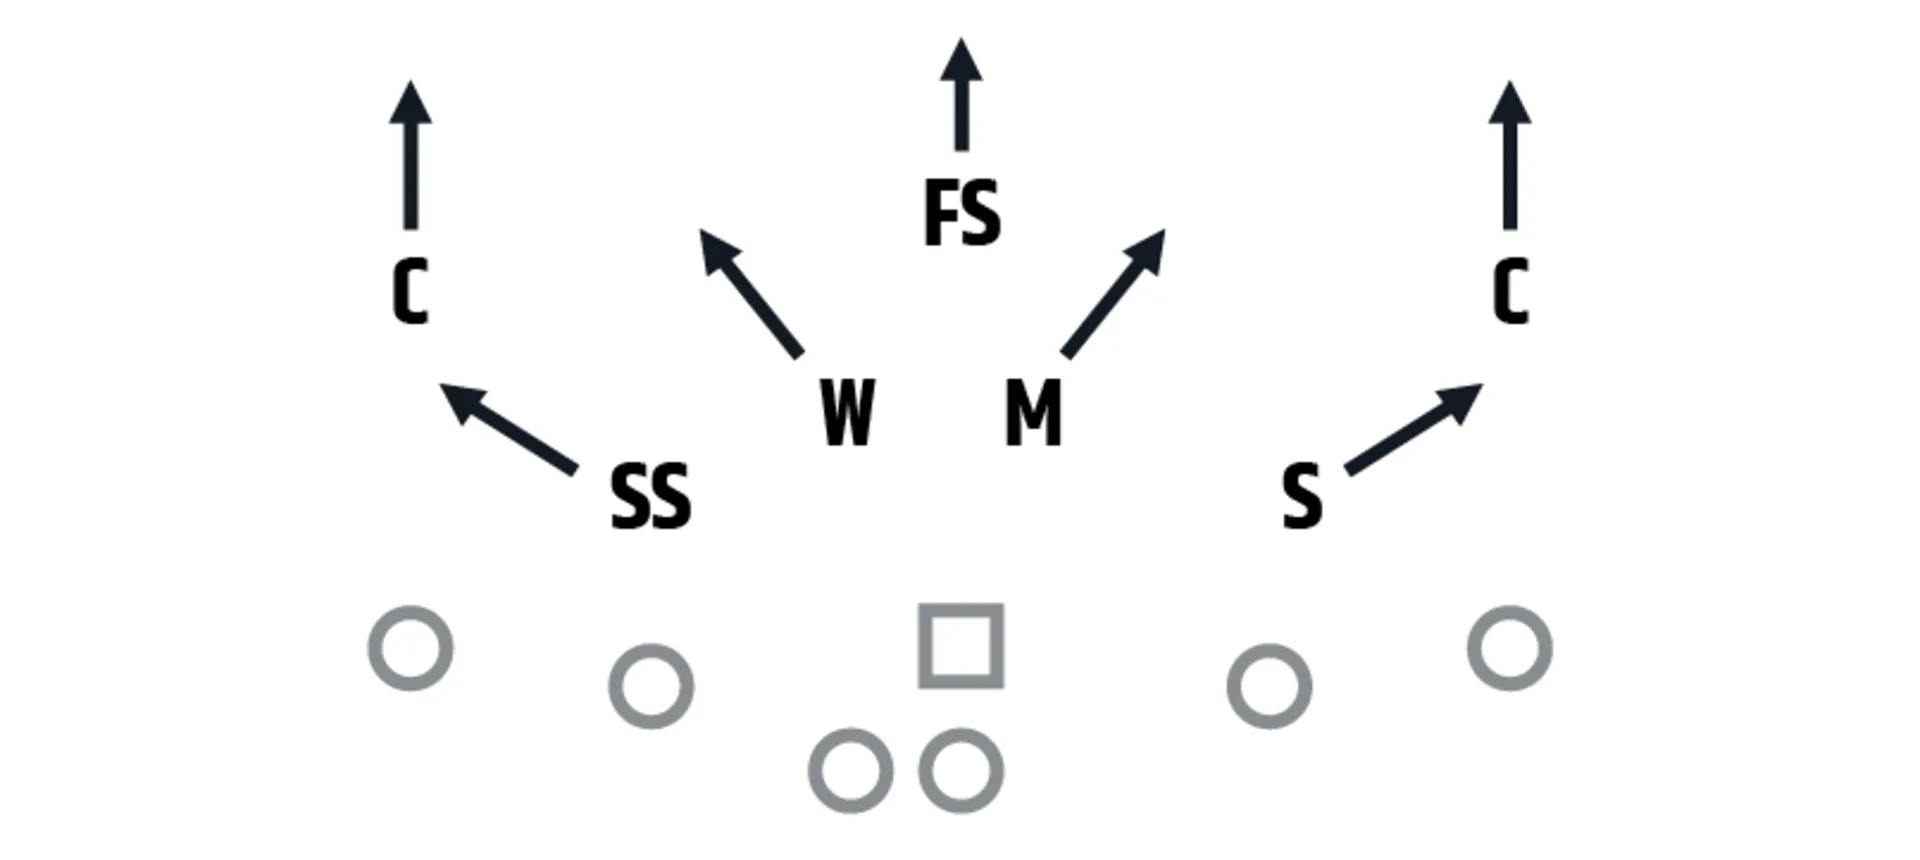
Trips puts three receivers to one side, where base Cover 3 has only two underneath defenders and one deep corner, plus the post safety in the middle. Whatever the defense moves over to match leaves the backside receiver more alone. Cover 3 is stressed in three places: the No. 3 vertical, Sail to the trips side and the isolated backside receiver.
Updated October 2026
Cover 3 Against 2x2 and Against 3x1 Trips
| Cover 3 vs 2x2 | Cover 3 vs 3x1 trips | |
|---|---|---|
| Receivers to the strong side | 2 | 3 |
| Underneath defenders to that side | Curl/Flat plus a Hook/Curl | Curl/Flat plus a Hook/Curl, unless the defense slides more over |
| Who takes a vertical by the inside receiver | The post safety, or the Curl/Flat defender carrying the seam | No. 3 vertical often falls to the post safety unless an underneath defender carries it |
| Backside | Two receivers against a corner, a Hook/Curl and a Curl/Flat defender | One receiver against the corner, often with less underneath help |
| Typical adjustment | None needed | Slide the underneath zones, bring the backside hook across, or check out of Cover 3 |
| Where it is stressed | Seams, Curl, Sail | No. 3 vertical, trips-side Sail, backside isolation |

How Cover 3 Adjusts to Trips
Each answer costs the defense somewhere. See which one you're facing.
- Slide the underneath defenders toward trips. The Hook/Curl and Curl/Flat defenders shift a gap, leaving a corner and maybe one Hook/Curl defender on the single receiver.
- Bring a linebacker across to match No. 3. The backside Hook/Curl defender takes No. 3 on an inside or vertical route, removing underneath help to the backside.
- Shade the post safety toward trips. That helps on the No. 3 vertical but puts the deep middle and the backside post farther away.
- Check out of Cover 3 into a special trips coverage or man.
Where to Throw
- No. 3 Vertical
No. 3, the receiver closest to the formation, runs straight up the seam. If nobody underneath carries it, the post safety has to, leaving the outside verticals and the backside post on corners with no middle help. When the safety widens to No. 3, throw away from it.
- Sail to the Trips Side
Deep, a sail at about 12 yards and a flat, with the post safety and the Curl/Flat defender to that side in conflict. Read it high to low: the deep route off the post safety, then the sail or the flat off the Curl/Flat defender. A third defender sliding over to stop it helps the backside.
- Stick Out of Trips
The stick and the flat attack the Curl/Flat defender while the outside receiver clears the corner. The extra receiver makes the spacing natural, which is why it's a staple.
- Backside Isolation
Every adjustment above moves help away from the single receiver. With the backside hook gone, a slant, curl or in route has room, and a soft corner gives you the hitch. Pick the throw before the snap.
Concepts Against Cover 3 from Trips
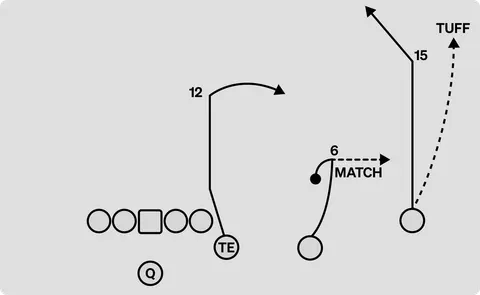
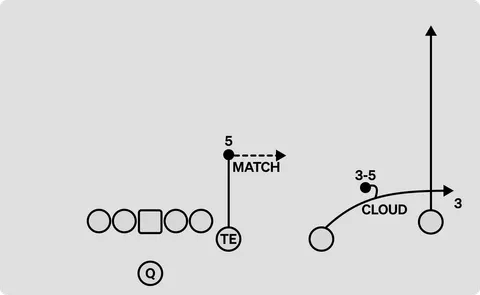
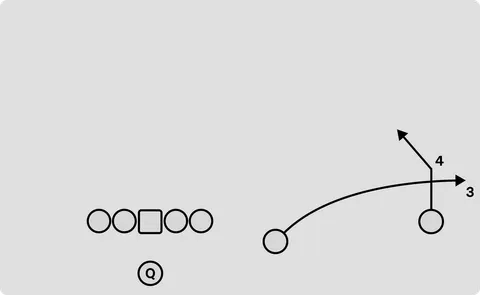
Before the snap, count the defenders over trips and over the single receiver. Moved toward trips: throw backside. Didn't move: the trips side has the numbers.
Common Questions
Why is trips hard for Cover 3?
Base Cover 3 has two underneath defenders and one deep corner to the trips side, so three receivers outnumber them. A vertical by No. 3 also puts the post safety in conflict.
What is the best play against Cover 3 out of trips?
Stick and a three-level Sail are the safest, because the extra receiver outnumbers the Curl/Flat defender. The No. 3 vertical is the shot, and the backside receiver is often one on one.
Who covers the No. 3 receiver in Cover 3?
A Hook/Curl defender usually takes an inside break by No. 3. A No. 3 vertical often falls to the post safety unless an underneath defender carries it, which is why defenses slide or bring a linebacker across.